I wanted to come up with a fun DIY Valentine’s Day gift for Charlotte this year. I searched the Internet high and low and finally came across this Custom Memory Game.
Of course I didn’t want to just order it, so I decided to make my own version using Adobe InDesign.
Instructions:
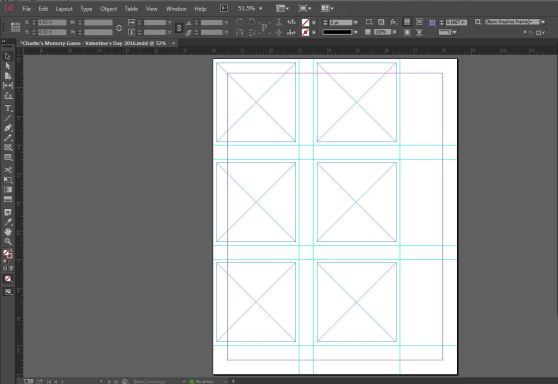
- Open up an 8.5″ x 11″ document
- Create (6) 3″ x 3″ photo boxes per page – I used 18 photos total, so I had 3 pages.
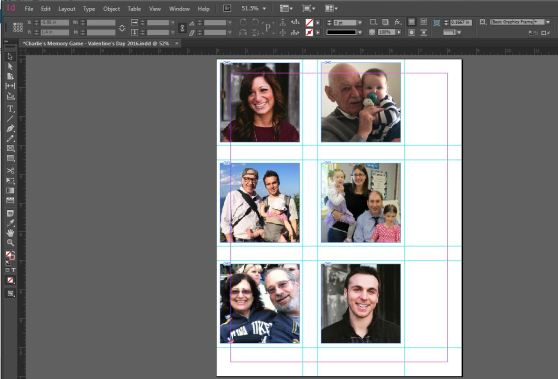
- Start to fill each photo box with close up photos of family, friends, and pets.
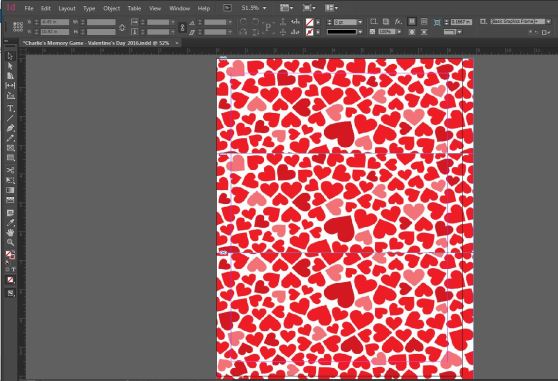
- Find a background design that will go on the back of your card. I chose hearts. I snagged the image from Google. My image was too small to spread across the whole backside, so I used the image three times, spread across columns that were slightly larger than the fronts of the card.
- Once everything is all set up in InDesign, it’s time to print. My printer isn’t amazing, but it was definitely good enough. I printed the front sides first onto cardstock. Remember, you need to print TWO COPIES of EACH PAGE.
- Then, I put the printed-on cardstock back in my printer to print the back side.
- Once the printing was complete, I started to cut out my cards using a paper cutter.
- Then, I used this corner rounder punch to round all of my edges and give my cards a slightly more “finished” look.
- Next, it was time to laminate. Again, we don’t have a fancy laminator, so I just used a standard 5mil thick lamination sleeve to laminate my cards. I was able to fit 12 cards per sheet.
- Once everything is laminated and cooled, I cut the cards out and was done!
- I ended up buying a little zipper pouch for card storage. I ordered this one (I used the small one with the little heart cut out) from Amazon.
The final result was well worth the effort and tediousness of all that cutting. Charlotte LOVES the cards. She doesn’t understand how to play Memory quite yet, but she matches the cards and loves pointing out all of her friends and family. Definitely a success!


